Codex
Codex CLI Custom API Guide
Configure Codex CLI to call models through the OurToken API and use your OurToken account balance in about 3 minutes.
Before you start: two values you need
| Setting | Value | Where to get it |
|---|---|---|
OPENAI_BASE_URL | https://api.ourtoken.ai/v1 | Copy this value directly |
OPENAI_API_KEY | Your OurToken API Key | Create it at https://ourtoken.ai/api-keys |
Important
OPENAI_BASE_URLshould be exactly:texthttps://api.ourtoken.ai/v1Do not append
/responses. Codex adds the request path automatically.When writing the API Key in
auth.json, do not add theBearerprefix.
Step 1: Install Codex CLI
Mac users
Open Terminal, then paste and run:
curl -fsSL https://chatgpt.com/codex/install.sh | sh
After installation, add Codex to your system PATH:
p="$HOME/.local/bin"; grep -qxF 'export PATH="$HOME/.local/bin:$PATH"' "$HOME/.zshrc" 2>/dev/null || echo 'export PATH="$HOME/.local/bin:$PATH"' >> "$HOME/.zshrc"; export PATH="$p:$PATH"; codex --version
Windows users
Search for PowerShell in the Start menu, open it, then paste and run:
powershell -ExecutionPolicy Bypass -c "irm https://chatgpt.com/codex/install.ps1 | iex"
After installation, add Codex to your system PATH:
$p="$env:USERPROFILE\.local\bin"; $u=[Environment]::GetEnvironmentVariable("Path","User"); if (($u -split ";") -notcontains $p) {[Environment]::SetEnvironmentVariable("Path",$u.TrimEnd(";")+";"+$p,"User")}; $env:Path+=";$p"; codex --version
Run:
codex --version
If the Codex version appears, installation is complete.
 Codex CLI version screenshot
Common issue
If the codex command does not run, check whether the Codex installation directory has been added to your system PATH.
⚠️ After installation, do not sign in with an OpenAI account. The next step connects Codex directly with your OurToken API Key.
Step 2: Configure OurToken credentials
After Codex is installed, configure these two files:
config.tomlauth.json
If the file or folder does not exist, create it manually.
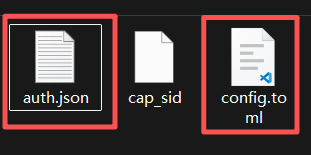 Codex configuration directory screenshot
1. Configure config.toml
File path:
Mac:
~/.codex/config.toml
Windows:
C:\Users\<username>\.codex\config.toml
Replace <username> with your Windows username.
Paste the following into config.toml:
model = "gpt-5.5"
model_provider = "ourtoken"
model_reasoning_effort = "high"
disable_response_storage = true
preferred_auth_method = "apikey"

[model_providers.ourtoken]
name = "ourtoken"
base_url = "https://api.ourtoken.ai/v1"
wire_api = "responses"
2. Configure auth.json
File path:
Mac:
~/.codex/auth.json
Windows:
C:\Users\<username>\.codex\auth.json
Paste the following into auth.json:
{
  "OPENAI_API_KEY": "Your OurToken API Key"
}
Replace Your OurToken API Key with the real API Key you created in OurToken.
Example:
{
  "OPENAI_API_KEY": "sk-xxxxxxxxxxxxxxxx"
}
Step 3: Verify the configuration
Open Terminal or PowerShell and run this command in any directory:
codex
After entering the Codex interface, send a simple message:
Hello
If Codex replies normally and you can see the API usage record in the OurToken Dashboard, the configuration is successful.
- ✅ Codex replies normally
- ✅ API usage appears in the OurToken Dashboard
- ✅ Your account balance changes accordingly
Codex is now connected to the OurToken API and ready to use.